


Clip Studio Paint is a digital art software that is available in two versions: EX and Pro. Both versions offer similar features, but there are some key differences between them.
Clip Studio Paint EX:
- Aimed at comic and manga artists
- Includes tools for creating panel layouts, word balloons, and special effects
- Includes features for creating comics and manga like rulers, Perspective rulers, and vector tools
- Has a 3D model and animation features for creating 3D art
- Can be used for digital painting and drawing, but not as full-featured as Pro version
Clip Studio Paint Pro:
- Aimed at professional digital artists
- Includes all the features of EX version
- Includes additional features such as advanced layer options, more brushes, and support for more file types
- Has more advanced tools for painting and drawing, such as more brushes, blending modes, and support for pressure-sensitive tablets
Both versions are great for digital art, but the Pro version is better suited for professional artists who need more advanced features and tools. The EX version is better for comic and manga artists who need specialized tools for creating comics and manga.

Keep in mind that the EX version is less expensive than the Pro version, but the Pro version offers a more complete set of tools, including advanced layer options, more brushes and support for more file types which can be crucial for more professional work.
Clip Studio Paint Pro includes all the features of the EX version, but also has some additional features that are not included in the EX version. These include:
- Advanced Layer Options: Pro version includes more advanced layer options such as layer folders, adjustment layers, and layer effects.
- More brushes: Pro version includes more brushes and tools such as airbrushes, watercolor brushes, and vector brushes.
- Support for more file types: Pro version supports more file types, such as PSD, TIFF, and PDF, allowing you to import and export files in these formats.
- Advanced tools for Painting and Drawing: Pro version includes more advanced tools for painting and drawing such as more brushes, blending modes, and support for pressure-sensitive tablets.
- 3D features: The Pro version allows you to create 3D models, advanced 3D materials and 3D animation
- Script Recording: The Pro version allows you to record actions you make and play them back, this is useful for automating repetitive tasks.
The EX version is designed for comic and manga artists, it includes specialized tools for creating comics and manga such as rulers, perspective rulers and vector tools, but it may not be as full-featured as the Pro version for more general-purpose digital painting and drawing.
PRO features not included in EX version
Clip Studio Paint Pro includes all the features of the EX version, but also has some additional features that are not included in the EX version. These include:
- Advanced Layer Options: Pro version includes more advanced layer options such as layer folders, adjustment layers, and layer effects.
- More brushes: Pro version includes more brushes and tools such as airbrushes, watercolor brushes, and vector brushes.
- Support for more file types: Pro version supports more file types, such as PSD, TIFF, and PDF, allowing you to import and export files in these formats.
- Advanced tools for Painting and Drawing: Pro version includes more advanced tools for painting and drawing such as more brushes, blending modes, and support for pressure-sensitive tablets.
- 3D features: The Pro version allows you to create 3D models, advanced 3D materials and 3D animation
- Script Recording: The Pro version allows you to record actions you make and play them back, this is useful for automating repetitive tasks.
The EX version is designed for comic and manga artists, it includes specialized tools for creating comics and manga such as rulers, perspective rulers and vector tools, but it may not be as full-featured as the Pro version for more general-purpose digital painting and drawing.
Animation frames

Animation frames are the individual images that make up an animated sequence. In traditional animation, these frames are drawn by hand on paper, and then photographed one at a time to create the illusion of motion. In digital animation, these frames are created using software such as Adobe Flash, Toon Boom, or Clip Studio Paint.
Each frame in an animation represents a slight change in the position, appearance, or expression of the animated characters or objects. When these frames are played back in rapid succession, the animation appears to move. The number of frames per second (fps) in an animation can vary, but a common standard is 24 or 30 fps.
Animation frames are used in various forms of media such as movies, video games, cartoons, and motion graphics. The process of creating animation frames is called keyframe animation, where an animator creates the key frames and then the software interpolates the frames in between, this process is called tweening.
Animation frames are essential for creating smooth, realistic movement in animation. Animators need to pay attention to details such as timing, spacing, and movement to make sure the animation looks believable and compelling.
Both Clip Studio Paint EX and Pro versions include features for creating animation frames.
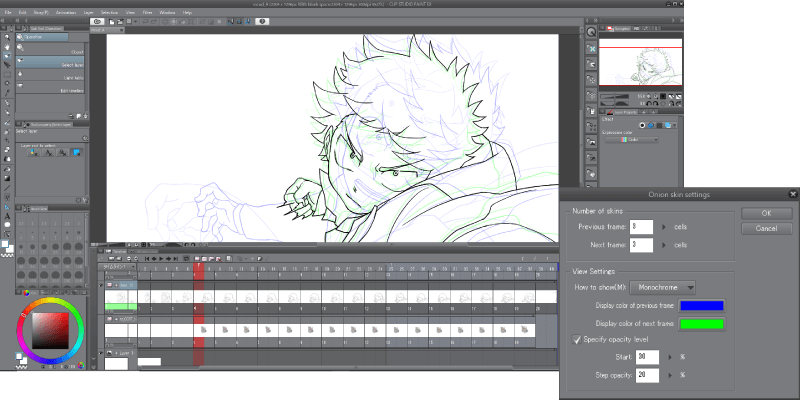
In Clip Studio Paint EX, animation frames are created using the Timeline feature. The Timeline allows you to create layers for each frame of the animation and then draw or paint on those layers to create the animation. You can control the playback speed and looping options, and also use onion skinning to see the previous and next frames while you work on the current frame.
In Clip Studio Paint Pro, animation frames are created using the Timeline feature, but it also includes additional features that are not included in the EX version. These include:
- Advanced Timeline: Pro version includes more advanced timeline options such as keyframe animation and motion blur.
- Advanced Onion Skinning: Pro version allows you to adjust the transparency of the previous and next frames, this is useful for creating more subtle animation.
- Sound Layer: Pro version allows you to add sound to your animation, this is useful for creating lip sync animation or adding sound effects.
- 3D features: Pro version allows you to create 3D models, advanced 3D materials and 3D animation.
- Auto-tweens: Pro version allows you to automatically create in-between frames between key frames, which can save a lot of time and effort.
In summary, both versions of Clip Studio Paint include features for creating animation frames, but the Pro version includes additional features such as advanced timeline options, advanced onion skinning, sound layers, 3D features and Auto-tweens that can save time and effort and make the animation process more advanced and efficient.
Multiple pages
Both Clip Studio Paint EX and Pro versions include features for creating and managing multiple pages.
In Clip Studio Paint EX, you can create multiple pages by using the “New Page” option in the “File” menu. You can then navigate between the pages using the “Page Manager” feature, which allows you to view, delete, and reorder pages. You can also create page templates, which allows you to create a new page with the same layout as an existing page.
In Clip Studio Paint Pro, you can create multiple pages by using the “New Page” option in the “File” menu. You can also navigate between pages using the “Page Manager” feature. In addition, the Pro version includes additional features for managing multiple pages such as:
- Multi-page Story: Pro version allows you to create a multi-page story, which is useful for creating comics, manga and graphic novels.
- Page Management: Pro version includes advanced page management options, such as the ability to create, edit and delete multiple pages at once.
- Layers Management: Pro version allows you to create and manage layers across multiple pages, which can save time and effort when working on a multi-page project.
- Script Recording: Pro version allows you to record actions you make and play them back, this is useful for automating repetitive tasks across multiple pages.
In summary, both versions of Clip Studio Paint include features for creating and managing multiple pages, but the Pro version includes additional features such as multi-page story, advanced page management, layer management, and script recording that can make the process of working on multiple pages more efficient and streamlined.
View and edit 3D materials
Both Clip Studio Paint EX and Pro versions include features for viewing and editing 3D materials, but the Pro version includes more advanced 3D tools.
In Clip Studio Paint EX, you can view and edit 3D materials using the 3D tools and features that are included. This includes the ability to create and edit 3D models, adjust lighting and camera angles, and apply textures and materials. However, the EX version is not as advanced as the Pro version, and may not include some of the more advanced 3D tools and features.
In Clip Studio Paint Pro, you can view and edit 3D materials using the 3D tools and features that are included, as well as additional advanced 3D tools and features. This includes the ability to:
- View and edit 3D materials from multiple perspectives: Pro version allows you to rotate, pan and zoom in and out of 3D models and materials, which allows you to view and edit them from numerous perspectives.
- Advanced 3D materials: Pro version includes advanced 3D materials options such as the ability to create custom materials, adjust lighting and shadows, and apply textures and shaders.
- Advanced 3D modeling: Pro version includes advanced 3D modeling tools such as the ability to sculpt and retopologize 3D models, create poseable 3D figures, and export 3D models in various file formats.
- 3D animation: Pro version allows you to create 3D animations, which can be exported to video or GIF format.
In summary, both versions of Clip Studio Paint include features for viewing and editing 3D materials, but the Pro version includes additional advanced 3D tools and features such as the ability to view and edit 3D materials from multiple perspectives, advanced 3D materials, advanced 3D modeling and 3D animation that allow for more flexibility and control when working with 3D materials.
Editing script lines in bulk
Both Clip Studio Paint EX and Pro versions include features for editing script lines, but the Pro version includes additional advanced features for editing script lines in bulk.
In Clip Studio Paint EX, you can edit script lines by using the “Text” tool to add and edit text on a panel. You can also use the “Word Balloon” tool to create and edit speech bubbles for characters. However, the EX version does not have advanced features for editing script lines in bulk.
In Clip Studio Paint Pro, you can edit script lines by using the “Text” and “Word Balloon” tools, as well as additional advanced features such as:
- Script Recording: Pro version allows you to record actions you make and play them back, this is useful for automating repetitive tasks in script editing, such as applying the same formatting to multiple lines of text.
- Text-to-Speech: Pro version allows you to convert written text into spoken word, this is useful for creating audio scripts for comics or animations.
- Script Templates: Pro version allows you to create and use script templates, which can save time and effort when creating scripts.
- Script Import/Export: Pro version allows you to import and export scripts in various file formats, which is useful for collaboration and editing scripts in other software.
- Script Clean-up: Pro version allows you to perform bulk editing on script lines, such as converting all caps to lowercase or removing unwanted formatting.
In summary, both versions of Clip Studio Paint include features for editing script lines, but the Pro version includes additional advanced features such as Script Recording, Text-to-Speech, Script Templates, Script Import/Export and Script Clean-up that can save time and effort, and make the script editing process more efficient and streamlined.
Convert models into line diagrams
Both Clip Studio Paint EX and Pro versions include features for converting 3D models into line diagrams, but the Pro version includes additional advanced features for converting models into line diagrams.
In Clip Studio Paint EX, you can convert 3D models into line diagrams by using the “Layer” tool to create a new layer and then using the “Pen” tool to trace over the 3D model. However, the EX version does not have advanced features for converting models into line diagrams.
In Clip Studio Paint Pro, you can convert 3D models into line diagrams by using the “Layer” tool to create a new layer and then using the “Pen” tool to trace over the 3D model. In addition, the Pro version includes additional advanced features for converting models into line diagrams such as:
- Advanced Vector Tools: Pro version includes advanced vector tools for creating accurate and precise line diagrams, such as the ability to create vector layers, apply vector effects and use vector brushes.
- 3D to 2D conversion: Pro version allows you to convert 3D models into 2D line diagrams with ease, this feature can be useful for creating technical illustrations or blueprints.
- Auto-trace: Pro version allows you to automatically trace over 3D models, which can save time and effort when creating line diagrams.
- Snap to 3D: Pro version allows you to snap the vector lines to the 3D model, which can create a more accurate line diagram.
In summary, both versions of Clip Studio Paint include features for converting 3D models into line diagrams, but the Pro version includes additional advanced features such as advanced vector tools, 3D to 2D conversion, Auto-trace and Snap to 3D that can save time and effort, and make the process of creating line diagrams from 3D models more efficient and precise.
Give images an illustrated look
There are several ways to give images an illustrated look in Clip Studio Paint. Here are a few methods:
- Hand-drawn effects: Use the pencil, pen, or brush tools to draw over the image by hand. You can adjust the brush settings to create a variety of line widths and textures to achieve the illustrated look.
- Filters and effects: Use the filter and effect tools to add a hand-drawn look to the image. You can find these tools under the “Filter” menu, or by right-clicking on the layer in the Layer palette.
- Pencil Sketch: You can use the “Pencil Sketch” filter to convert the image into a pencil sketch-like look. This filter can be found under the “Filter” menu.
- Watercolor filter: You can use the “Watercolor” filter to give the image a more illustrated look, this filter can be found under the “Filter” menu.
- Layers: you can use the “Layer” feature to create different layers and apply different filters, brushes and effects to each layer. This is useful for creating a more dynamic illustrated look.
- Textures: You can use the “Texture” feature to apply different textures to the image, this can give the image a more illustrated look.
It’s worth experimenting with different filters, brushes, and effects to find the best combination that gives the desired illustrated look. Additionally, you can use different techniques such as adjusting color balance, contrast, and brightness to achieve the illustrated look you want.
Devices
Clip Studio Paint can be used on a variety of devices, including:
- Desktop computers: Clip Studio Paint can be installed on Windows and macOS computers and can be used with a mouse and keyboard or with a graphics tablet.
- Laptops: Clip Studio Paint can be installed on laptops running Windows or macOS and can be used with the built-in touchpad or with an external graphics tablet.
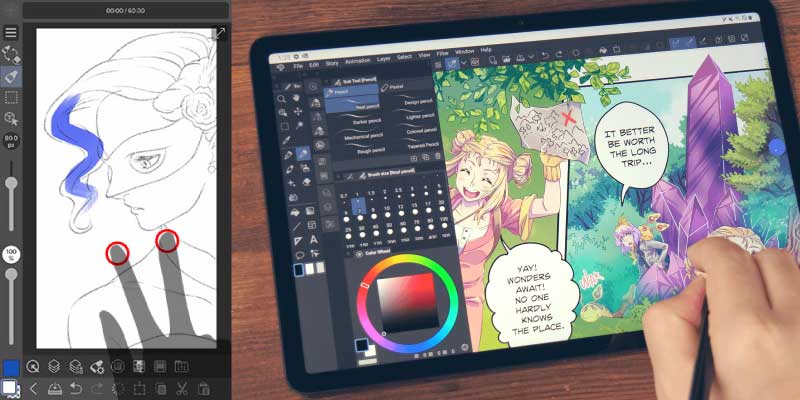
- Tablets: Clip Studio Paint can be installed on tablets running Windows or macOS, and can be used with a stylus or finger to draw and paint.
- Mobile devices: Clip Studio Paint can be installed on mobile devices running iOS or Android, and can be used with a stylus or finger to draw and paint.
- Graphics tablets: A graphics tablet is a peripheral device that allows you to draw on the tablet surface and the image appears on the computer screen. This can be useful for digital painting, drawing, and animation. Popular brands of graphics tablets include Wacom, Huion, and XP-Pen.
It’s worth noting that the features and tools available on different devices may vary depending on the device’s specifications and operating system. Some features may not be available on certain devices, and the performance of the software may vary depending on the device’s hardware.
Conclusion
In conclusion, Clip Studio Paint is a versatile digital art software that can be used on a variety of devices such as Windows and Mac computers, iOS and Android tablets, Chromebooks, Surface Pro and other Windows tablets and Wacom tablets. The features and tools available on each device may vary depending on the device’s hardware and software capabilities. However, regardless of the device you use, Clip Studio Paint offers a wide range of features such as advanced timeline options, advanced onion skinning, sound layers, 3D features, Auto-tweens, advanced vector tools, 3D to 2D conversion, script recording, script templates, script import/export and script clean-up among others. These features allow for a more efficient and streamlined workflow, whether you’re working on comics, manga, graphic novels, technical illustrations or animations.